


Git, Gitter, Gittest! - A Beginner's Guide to Git - Part II - Branching & Merging


In part 1, I gave a very brief introduction to git, then we created a simple project and pushed it to GitHub. If you haven't read part 1, check it out here, Git, Gitter, Gittest! - A Beginner's Guide to Git - Part I.
In this part, we will cover,
- Adding new changes to an existing branch (adding new commits)
- Creating new branches
- Merging branches
Let's begin by adding new changes
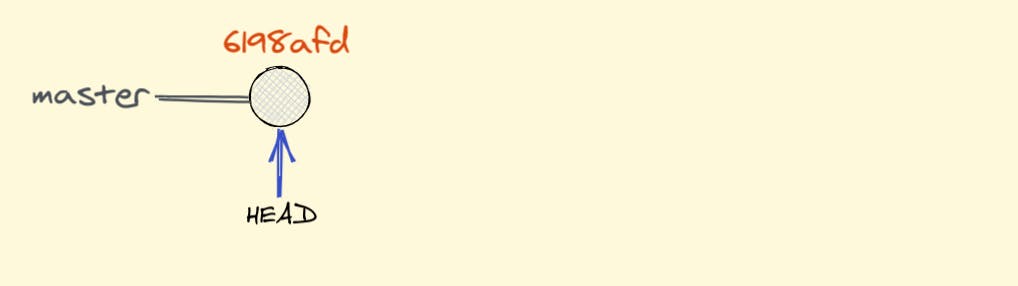
In the previous part, we had made just 1 commit. We can see our commits using the git log --oneline command.

Illustrating our commit history below.
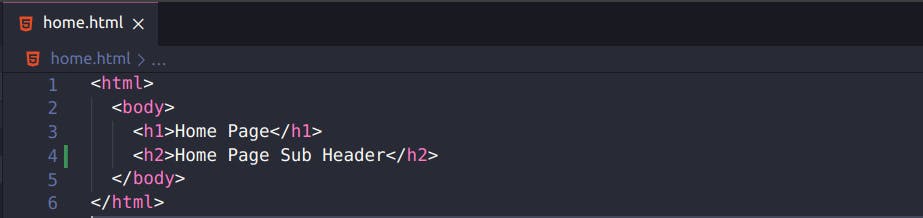
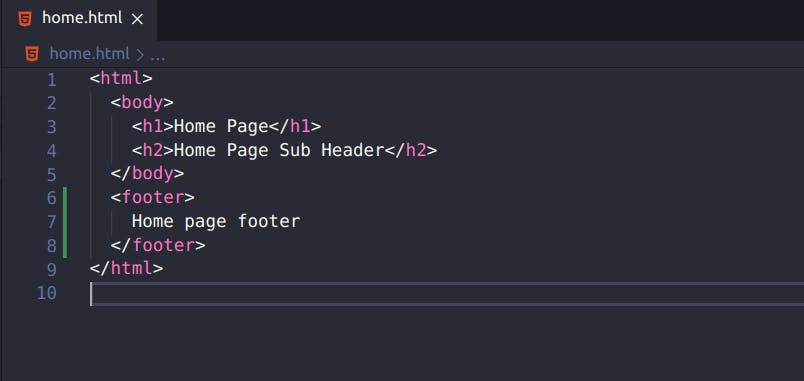
Let's make a change in the home.html file and run the git status command.
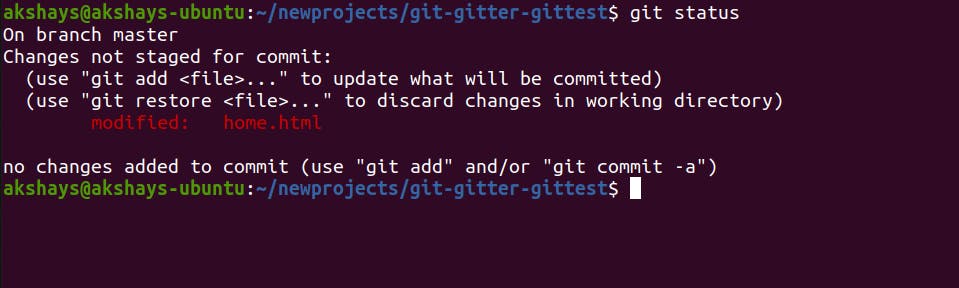
Git has noticed that we have made a modification in our home.html and is prompting us to add and commit.
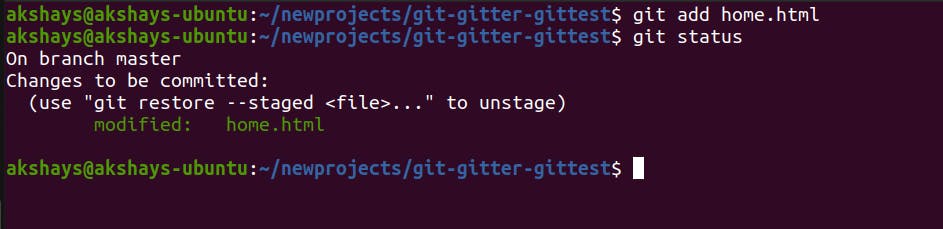
So, we run git add home.html so that home.html is staged for the next commit.
Once we commit, git displays the branch master, the new commit ID b35d727, and the message/ description we mentioned while committing.

In the logs, the local master is pointing to the latest commit and in our GitHub repository (which is our remote repository) it is pointing to the first commit.

Let's add one more commit.
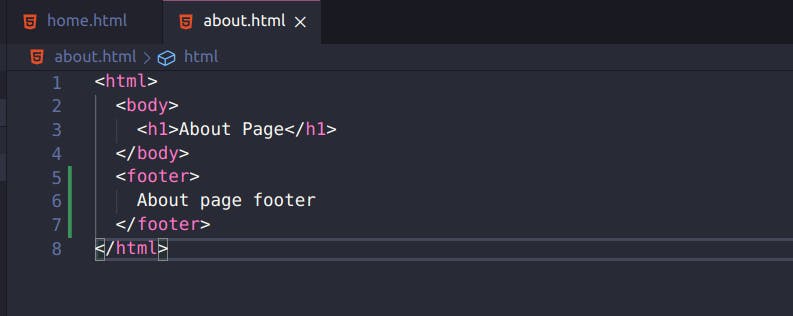
We will add some more changes in both our files home.html and about.html.
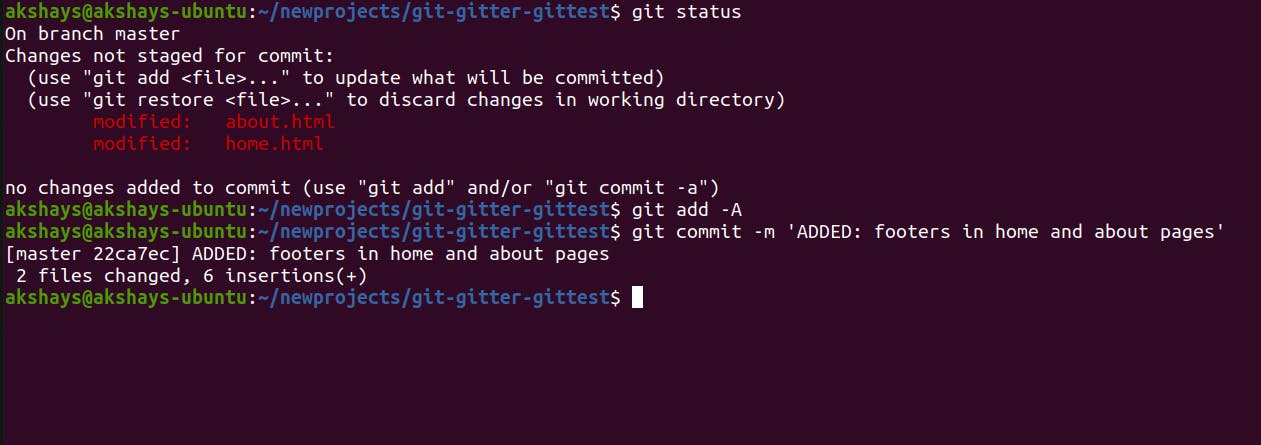
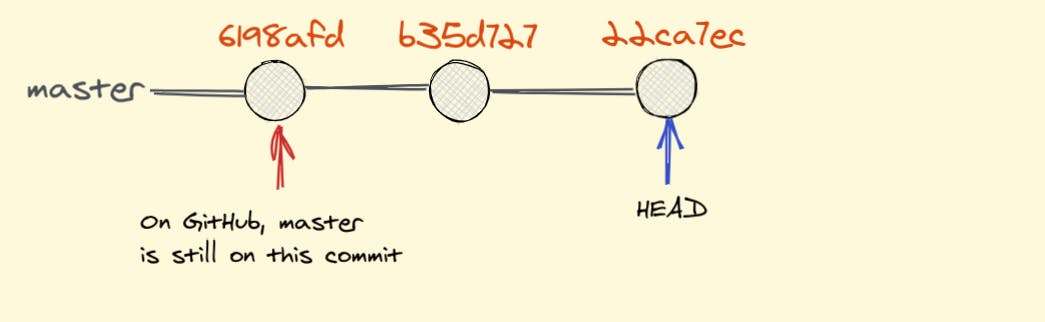
Again, let's add and commit the changes. We have our new commit 22ca7ec.
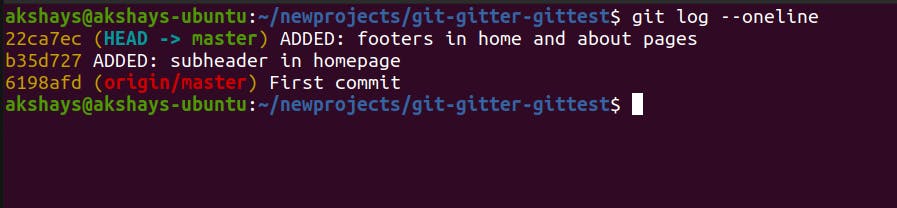
In the logs, we see the local master is pointing to the latest commit 22ca7ec, and the remote master is still pointing to the first commit 6198afd.
Our local master and remote master is not in sync, which means the 2 new commits are not in our GitHub repository.
So, we push the code!
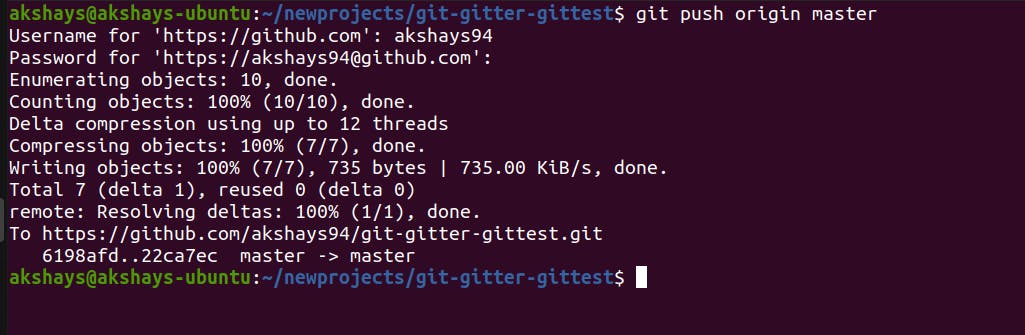
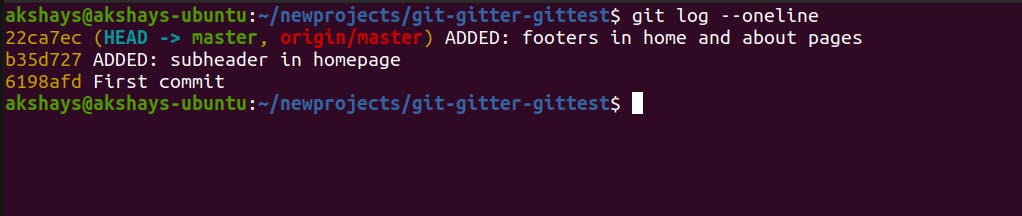
Now the logs show us that the local master and the remote master are pointing to the latest commit 22ca73c.

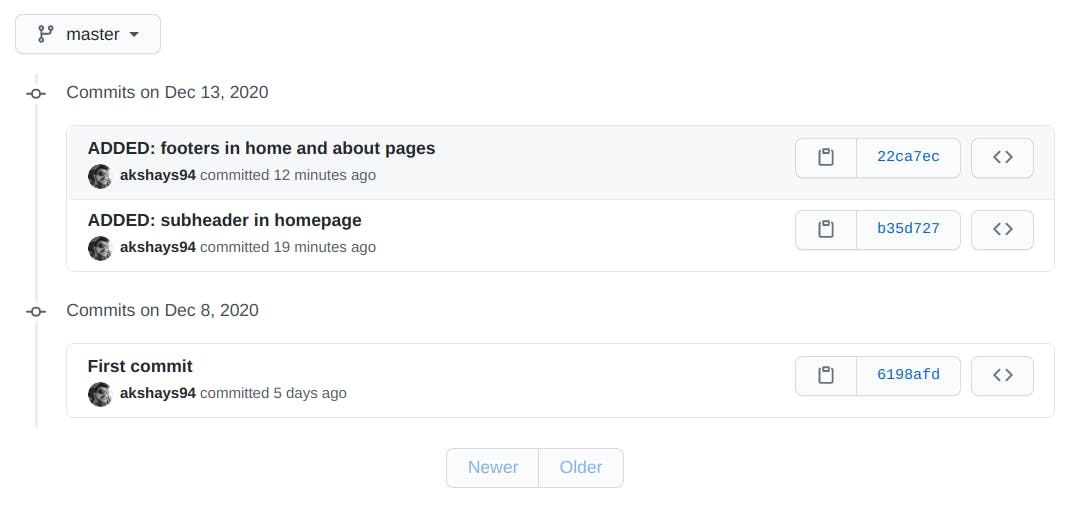
All the commits are being displayed on the GitHub repository's commits page as well.
This is how we add and push new changes to our existing branch!
Creating a new branch
"Why do we need a new branch?"
You are working on your main branch and a new feature implementation was assigned to you.
This is where you can create a branch for this feature implementation so that you can work on this feature in isolation and whenever you feel the work is done, this branch can be merged to your main branch.
While working on your new feature branch, you may have to switch and fix or add something to your main branch. Branching helps a lot in such situations. If the new feature was being implemented on the main branch, the incomplete code would have been pushed to the main branch.
An awesome new feature is assigned to you
Let's create a new branch awesome-new-feature using the git branch <branch-name> command. This command will create a new branch named awesome-new-feature from our master branch (since we are currently on the master branch).
Note that this command will create a new branch but NOT SWITCH to this newly created branch.
To switch, we can use the git checkout <branch-name> command.
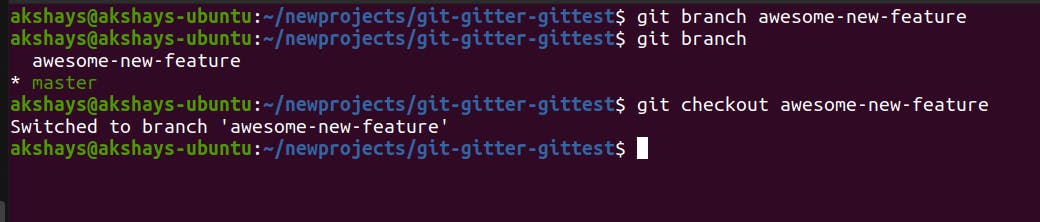
We are now in our new branch awesome-new-feature!

Also in the logs, awesome-new-feature and the master are pointing to the same latest commit.

On this new branch, we make some modifications in the home.html file and add a new contact-us.html file.
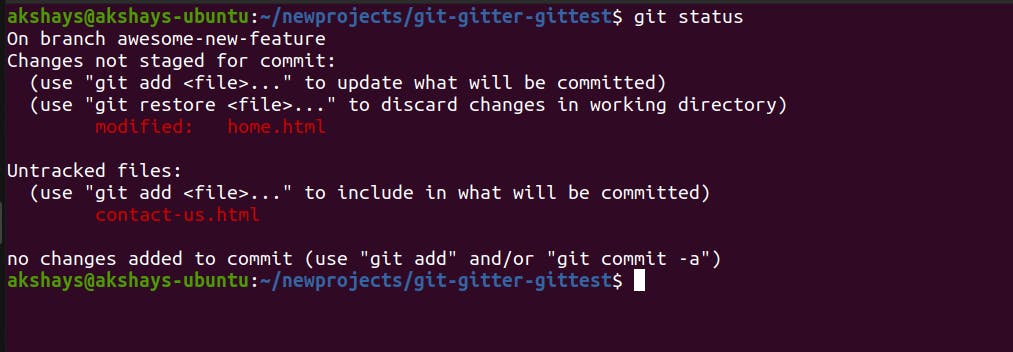
The git status command shows us that we are on the awesome-new-feature branch and we need to add and commit our code.

After committing, the logs show us that the awesome-new-feature is pointing to the latest commit 626ec2f and the master is still pointing to the second last commit 22ca7ec.

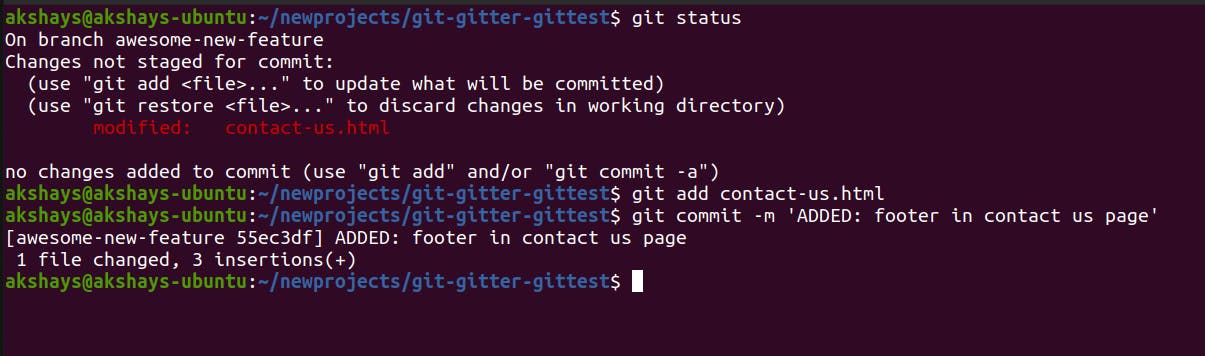
Let's create some more modifications in the contact-us.html file and create a new commit.
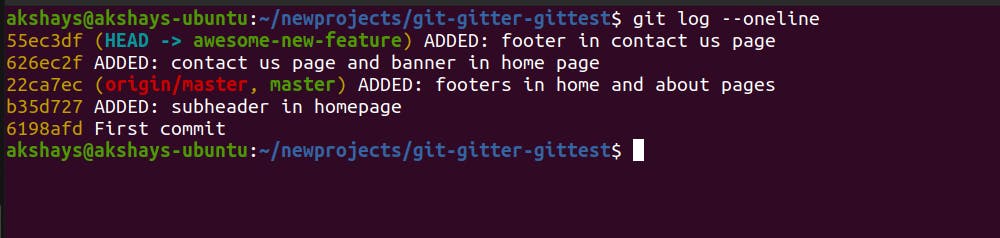
After committing, the logs show us that the awesome-new-feature is 2 commits ahead of the master branch.
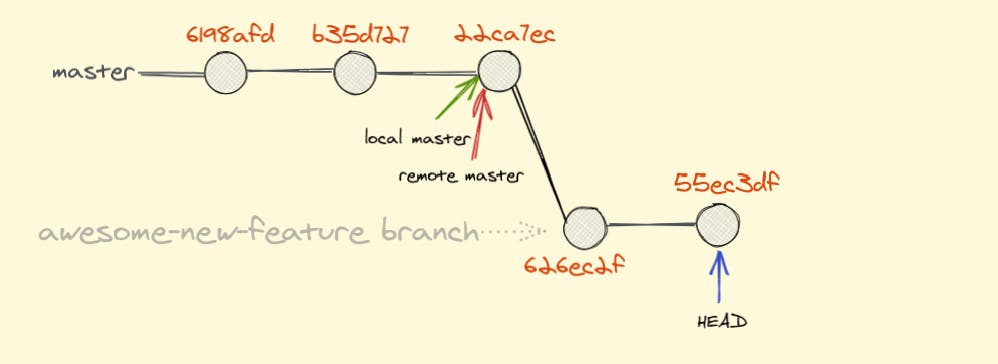
Let's say that our awesome-new-feature is completed and we decide to move this code to our master branch.
That means we have to MERGE our awesome-new-feature to master.
Merging awesome-new-feature to master
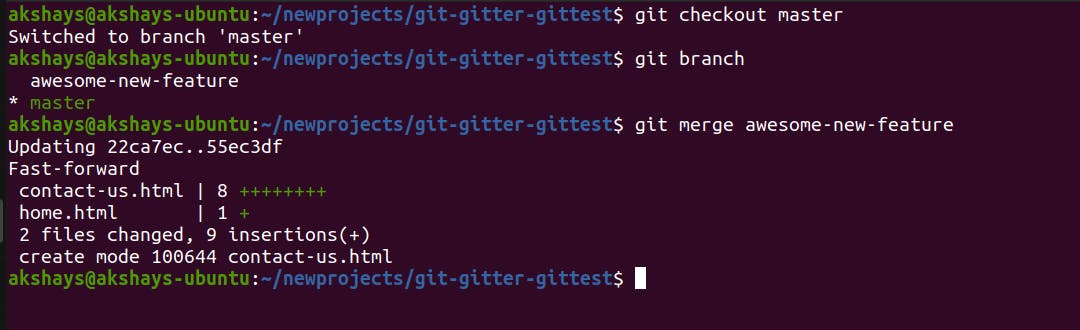
To merge, we need to switch to the branch where the code has to be merged. In our case, that branch is master.
After switching, run the git merge <branch-name> command to merge the branch specified awesome-new-feature to the current branch master.
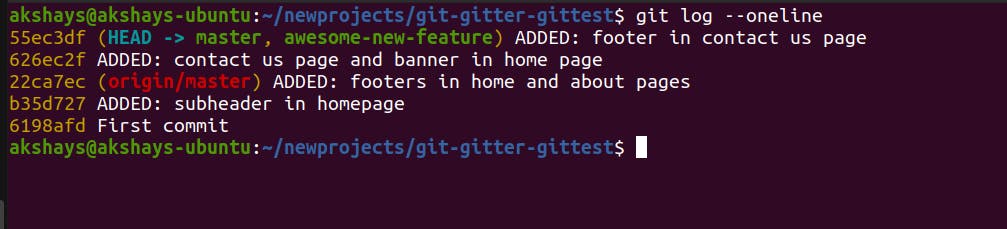
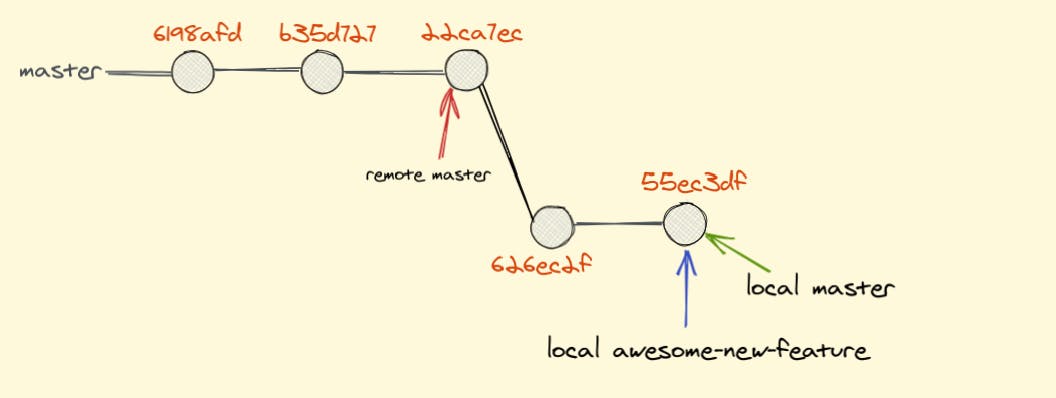
The local master and the local awesome-new-feature is pointing to the same latest commit after the merging.
Deleting awesome-new-feature after merging
If we want, we can also delete the awesome-new-feature branch since it is merged. The git branch -D <branch-name> deletes the branch specified.
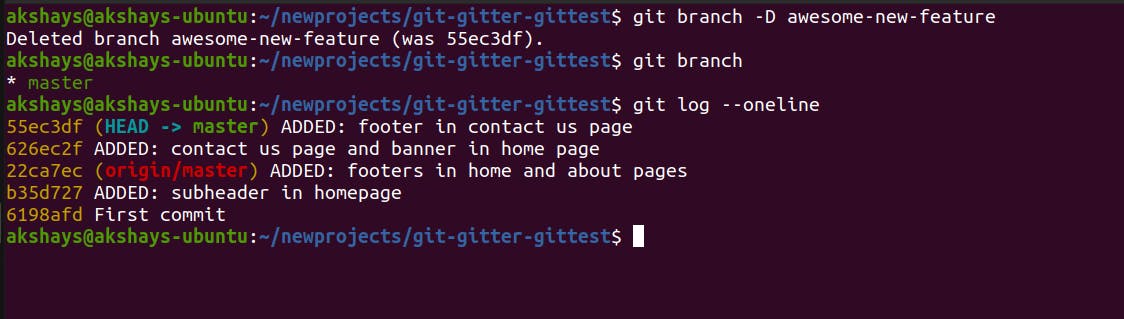
After deleting, our commit history looks like this.
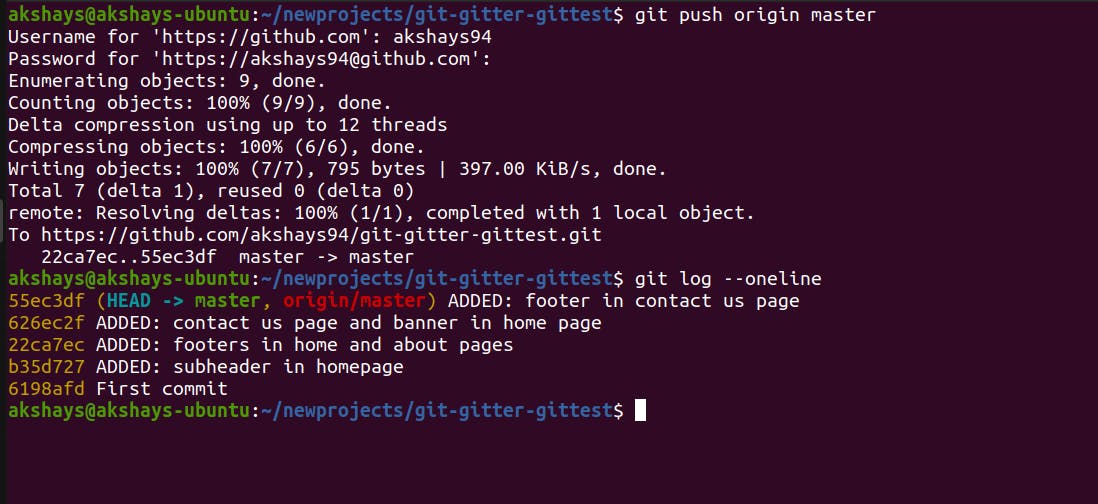
The local master is 2 commits ahead of the remote master i.e. the 2 new commits that we created locally are not on our GitHub repository.

Once we push our code to the master branch, the local master and the remote master will be in sync.
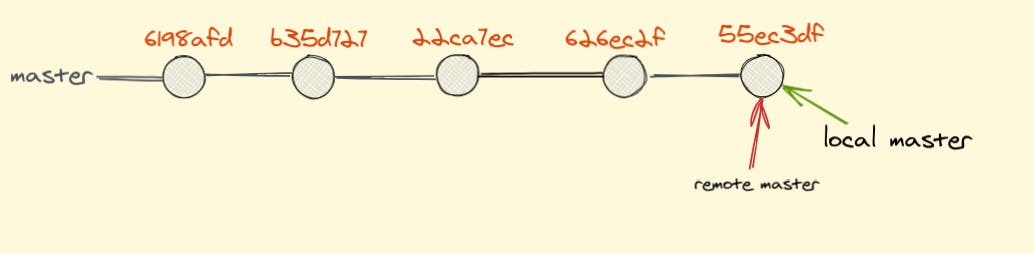
And our new commit history!
So, to recap, we
- Created a new branch.
- Worked on this new branch independently.
- Merged this new branch to our main branch.
- Deleted the newly created branch.
- Pushed our code to GitHub.
The merge commit
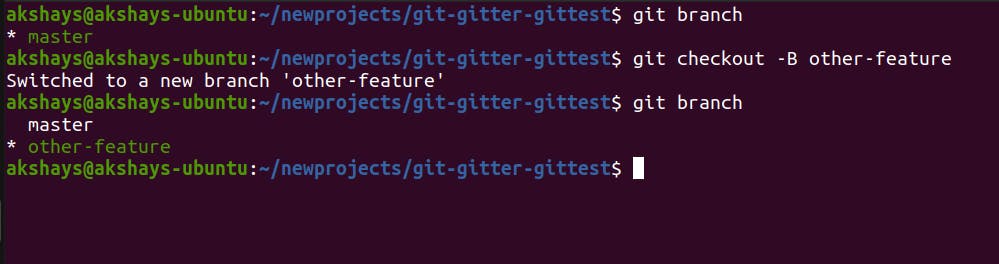
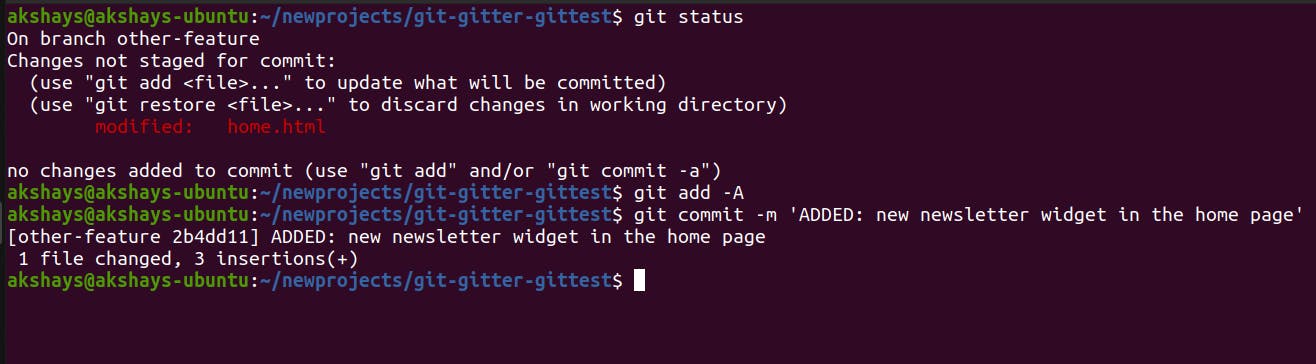
Let's create a new branch other-feature for a new feature that we are building.
We make some changes and add a commit to this branch other-feature.
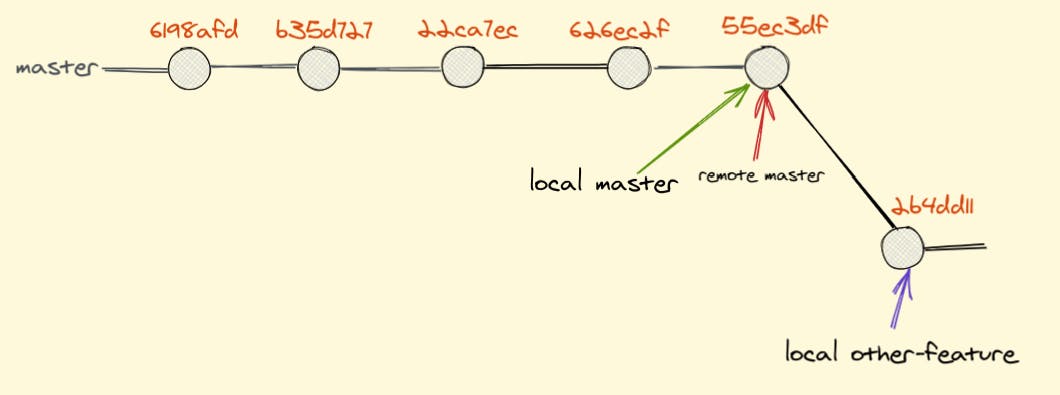
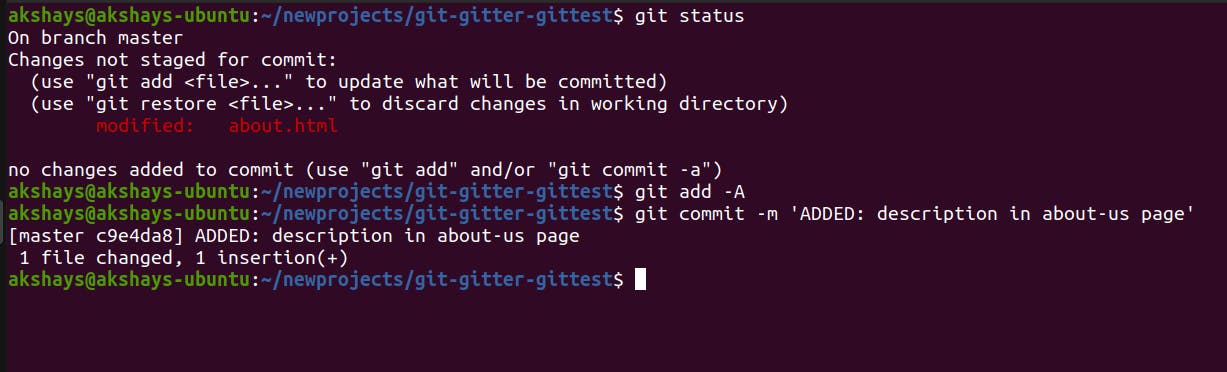
Let's say, we have to make changes in our master branch. So, we switch to the master branch.

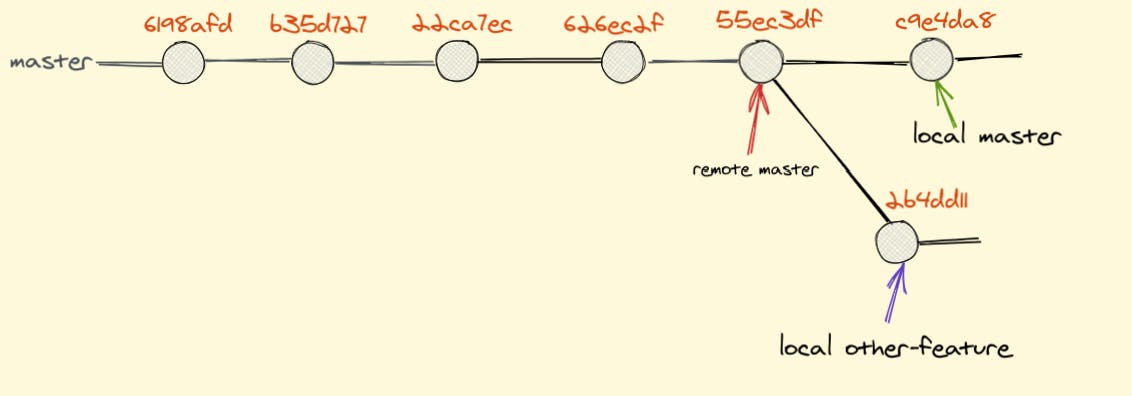
After the updates are added, we create a new commit in the master branch.
The commit history looks like this. The master branch has moved forward.
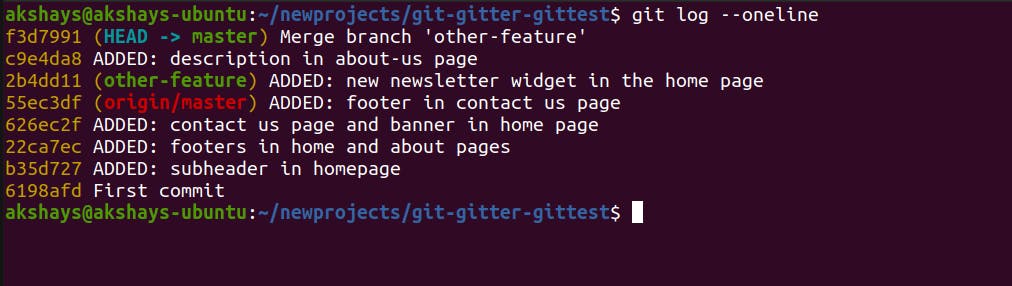
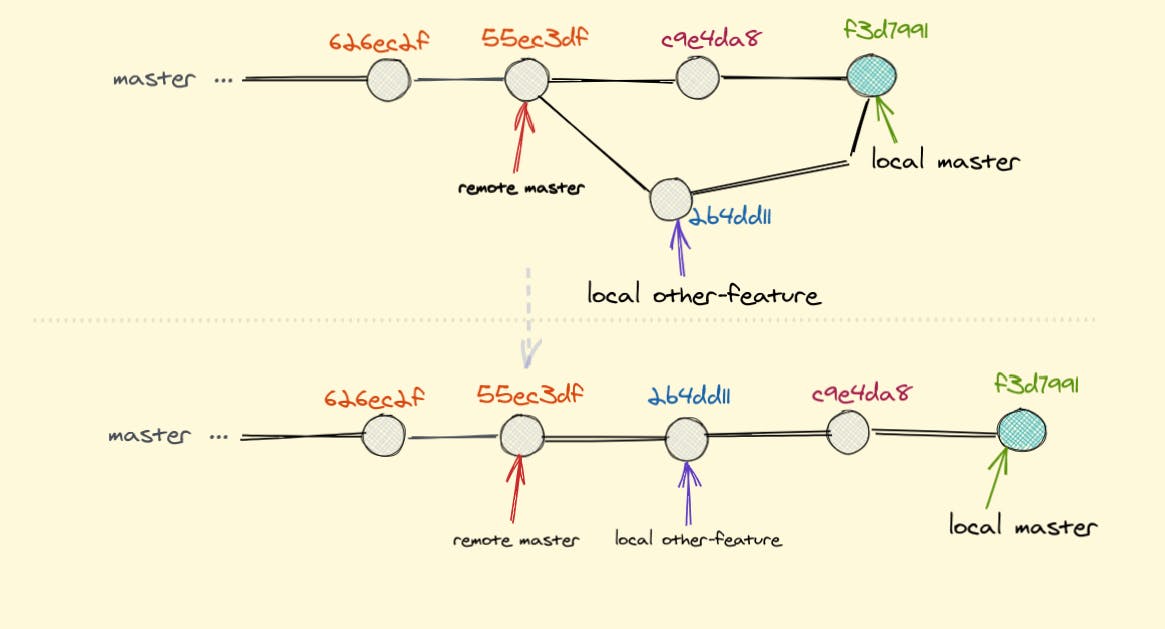
When we merge other-feature to the master branch, git creates a merge commit. Git will automatically try to merge separate branches and create a new commit which is called the merge commit.

In the logs, f3d7991 is the merge commit added by git with a commit message Merge branch 'other-feature'.
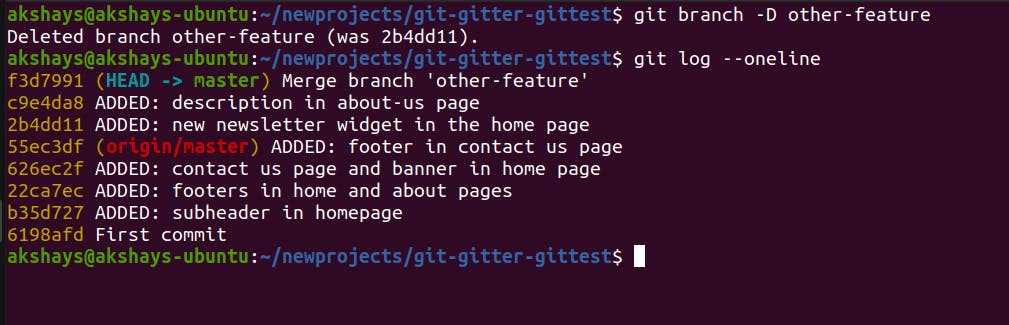
We can delete the other-feature branch after merging.
Now we push to the master branch!

This is how the commit history looks like now on the master. There are no signs of any previous branches that we created.

I hope this was simple and easy to understand. Branching will help you manage your code in a much better way.
Thanks for reading!